fatal: unable to access 'https://github.com/ovshinsky/ovshinsky.github.io.git/': Failed to connect to github.com port 443 after 21098 ms: Couldn't connect to server
解决方法:github连不上了,稍等重新hexo d部署页面即可。- 图片显示不出来
把.md文件中图片路径前面的..两个点删掉
fatal: unable to access 'https://github.com/ovshinsky/ovshinsky.github.io.git/': Failed to connect to github.com port 443 after 21098 ms: Couldn't connect to serverhexo d部署页面即可。把.md文件中图片路径前面的..两个点删掉
主要是我自己用的比较多的一些软件,有一些还没有安装:
链接:https://pan.baidu.com/s/1XHCDHUSGgn-p5HQMH1VrIw
提取码:f1ik
https://www.yuque.com/ningmengna-6ulrv/gu0o2u/gu4tmfgur2kqtq7o
https://www.yuque.com/ruanjian-jkyer/qik9br
【实用软件】ANSYS Lumerical 2023 R1安装教程 (qq.com)
Lumerical FDTD 2023 R2.3安装-CSDN博客
2023r1: https://pan.baidu.com/s/1Tznv7gMIFvgvcfMpyT0ghQ?pwd=imkg
2023r2.3: https://pan.baidu.com/s/1V9j8SsaU4d2-5Zk1TUKWFQ?pwd=h9vr
2024r1:Luemrical 2024 R1
链接:https://pan.baidu.com/s/1wbxZ074Z184wBtkcL6Yc9A
提取码:admw
gpu加速配置教程:FDTD GPU Solver Information – Ansys Optics
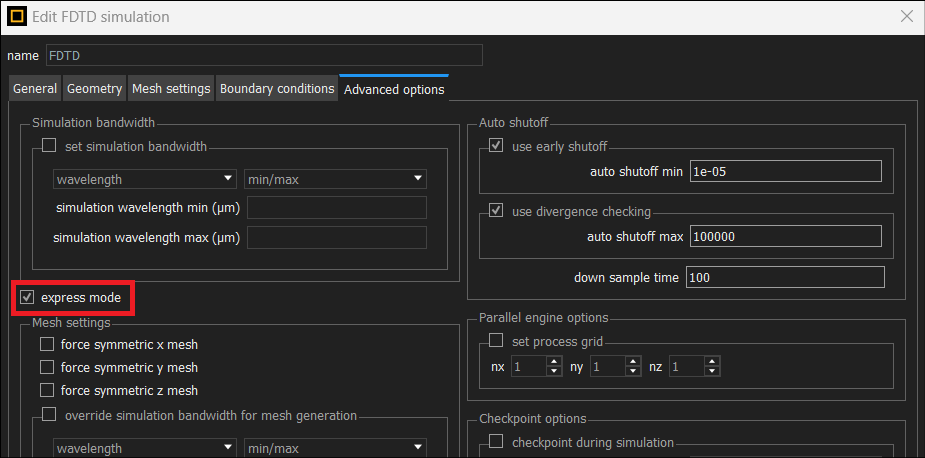
GPU仿真加速不支持对称和反对称的边界条件
运行软件前需要先启动license manager服务
采用gpu仿真需要勾选:

KLayout Layout Viewer And Editor
https://note.youdao.com/s/UJLHVtw8
【实用软件】Cinema4D 2024(C4D 2024)安装教程 (yuque.com)还是用C4D吧
安装node.js和git
npm install hexo-cli -g
hexo init myblog
这里因为可能运行路径不对卡了挺久,可能是因为默认的路径不能创建文件夹,最后发现在桌面上右键cmd打开搞定了。
切换到项目中
cd myblog
安装依赖
npm install
本地预览
hexo g
hexo s
然后在浏览器中输入对应的端口网页
新建文章
hexo new test
本质上就是新建了一个markdown文件,可以后续进入这个markdown文件进行修改和写东西
就可以重复之前的预览看看结果啦
创建github pages
创建github仓库:username.github.io
修改之前生成的文件夹中配置文件,_config.yml,
修改为:
1 | deploy: |
部署执行命令:
hexo d
可能需要安装插件:
npm install hexo-deployer-git --save
然后就可以打开ovshinsky.github.io查看效果
1.安装主题
在主文件夹里运行cmd:
git clone https://github.com/theme-next/hexo-theme-next.git themes/next
切换版本(可选):
cd themes/hexo-theme-next
git checkout tags/v6.0.1
2.配置主题
打开主文件夹中的_config.yml,配置为theme:next
采用gitalk配置,next的主题里预留了接口:
打开next文件夹中的_config.yml,创建一个Comment仓库,配置为
1 | gitalk: |
安装依赖:npm install hexo-renderer-marked
在_config.yml中设置:
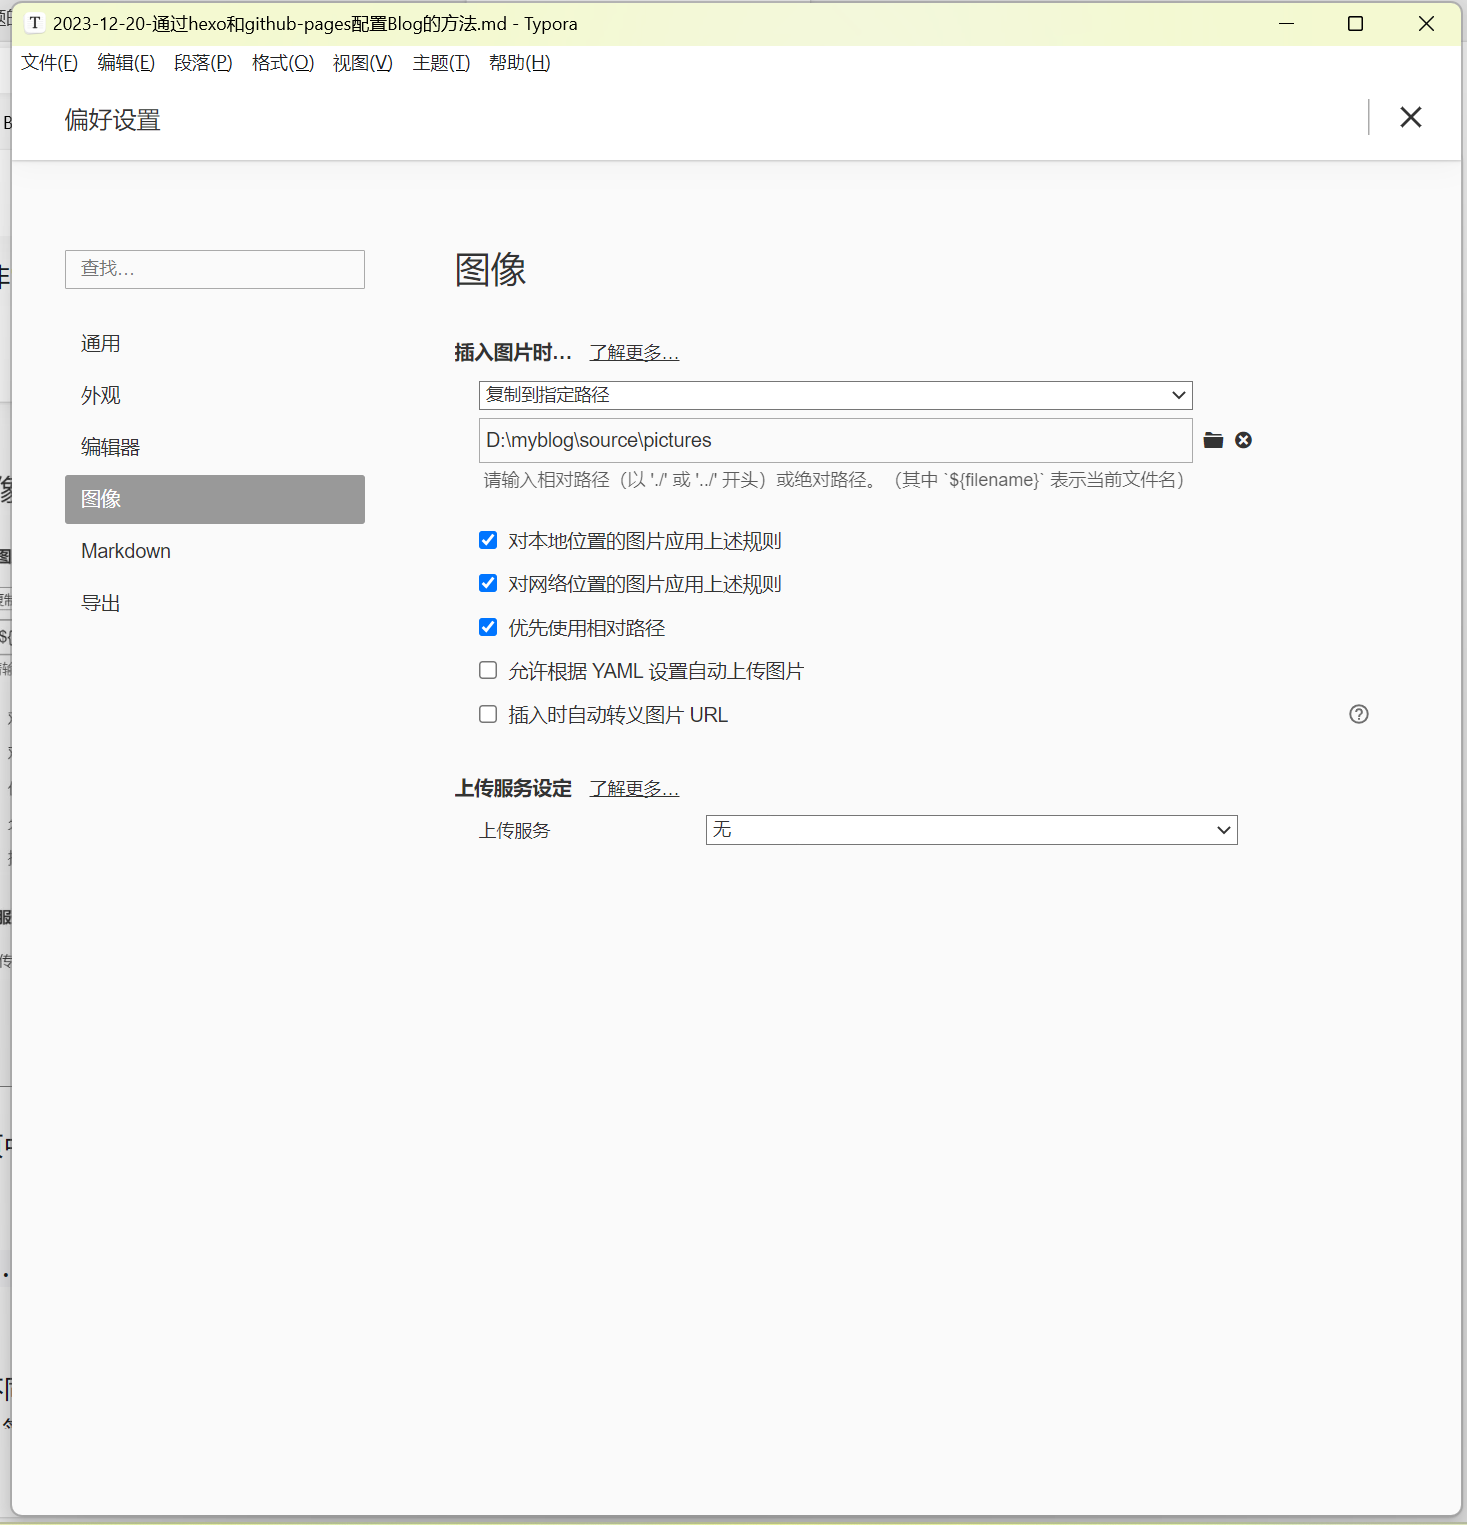
1 | post_asset_folder: true |
最后,按如下方法修改typora的配置即可:
[1] Creating optimization tasks using a script – Ansys Optics
在文件夹中右键,选择命令提示符或者git bush
hexo new [布局] <标题>
布局默认为[_drafts]文章,或者[_drafts] 草稿;或者[source]页面。
可以通过publish _drafts <标题>来发布草稿
其中布局和保存文件夹的对应关系如下:
post |
source/_posts |
|---|---|
page |
source |
draft |
source/_drafts |
hexo clean
hexo g
hexo s
hexo d
1 | <a href="/download/[文件名]"download>[想要显示的文本]</a> |
记得[]要删掉。
REF: Hexo添加附件下载功能 | 清河的博客 (lasonneil.github.io)
插入图片后把.md文件中前面两个点删掉,可能typora和网页导入的方法不一样。